Southeast Wilderness Survival
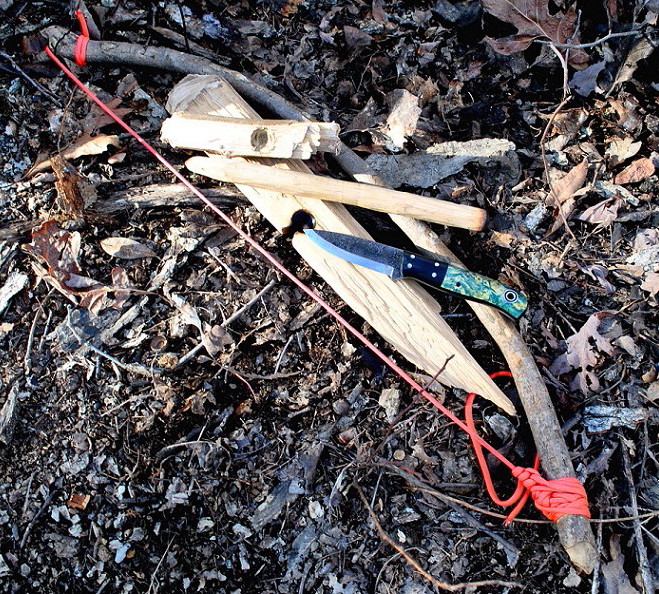
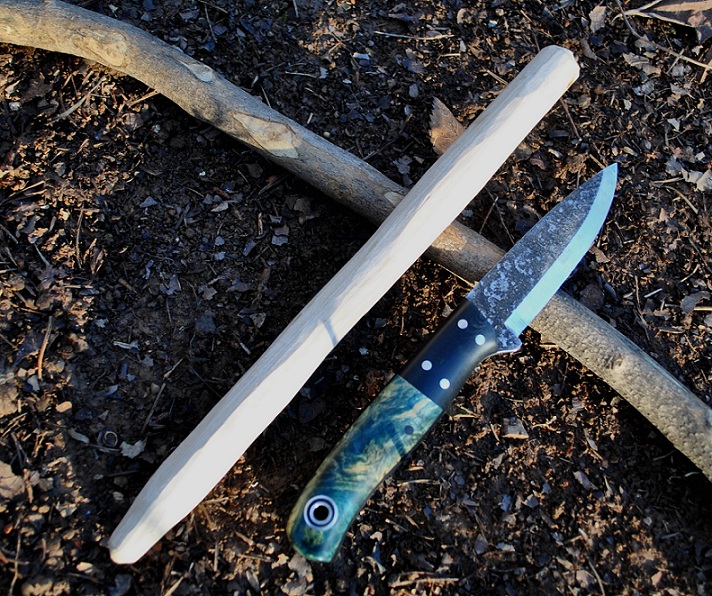
The fire-bow is primitive method of fire starting for which all of the necessary components can be made in most wildernesses though the available materials will vary from region to region. This method consists of a bow, a spindle, a bearing block, and a hearth-board. I have found that in most cases in the south east this system can be made using only a small knife. Actually the parts can usually be fashioned using only rocks and materials found in the wilderness, however that is a very time consuming process that is really labor intensive. I much prefer to use a good sharp knife. For this tutorial I'm using one of my smallest knives, a knife that Andy Roy of Fiddleback Forge aptly named his Hiking Buddy Model as it has been my buddy on several wilderness hikes. It only has a 3-inch blade but don't let the size fool you, it's a very capable tool.
As the name implies, the first component needed for this method is a bow which is used to turn the spindle. To make a bow you need to find a bent sapling or bowed limb about 1 in / 2.5 cm in diameter and cut it to about 30 in / 75cm or so in length. Bow length is actually a matter of personal preference and with practice you may want to adjust to a longer or shorter bow, but we have to start somewhere and this is my preferred length. Then take a piece of whatever cordage you have available; para-cord, a boot lace, a draw string from a pack. or something of that nature, and attach it to the ends of the bow removing most or all of the slack in the line so that it actually looks like an archery bow. Natural cordage can be made in many environments using braided vines or fibers form long leaves, or can be made by braiding strips of cloth cut from an article of clothing. However this is a time consuming process and I would rather carry cordage on my person or use a boot lace. I always have a para-cord bracelet on my wrist when I hit thew bush.
The next component needed is a spindle. The spindle is one of the critical parts of this mechanism. It is the part that will be drilled into the hearth-board in the process of creating a socket and then in the process of making the ember. Spindle size is a personal thing, some like longer spindles and some like them shorter. Personally I like my spindles to be about a foot long or a little longer so I don't have to bend down so much. As far as diameter I typically make my spindles about 5/8 to 3/4 of an inch in diameter at the drilling end, and maybe a little fatter in the middle. This size range seems to give me the best combination of rigidity, surface area in the socket, and diameter for keeping good tension on the bow string.
For me the shape of the spindle is very important in order to make an effective fire-bow set. In my sets each end of the spindle is shaped differently for very important reasons. I like for the bearing or upper end of the spindle to taper nearly to a point so that it has less surface area. but then have a well rounded tip so that it roughly resembles a well worn wooden pencil tip. This taper shrinks the surface are of the tip to friction in the divot of the bearing block, and the well rounded tip helps to keep the spindle from drilling through the wooden bearing block too quickly.
The lower or drilling end of the spindle needs to be at least slightly pointed so that it will stay in the divot rather than spin out but at an obtuse angle so as to have more surface area in contact with the hearth to create the amount of friction that is necessary to produce the heat needed to make the dust and form the coal. In most cases I prefer to make my spindle and hearth from the same wood. However if that isn't possible then I prefer to have a spindle made of a wood softer that the wood the hearth-board is made from. This usually ensures more than one coal made per socket in the hearth-board. In a survival situation this is good because if you lose the first ember for whatever reason then there isn't quite as much work to do before attempting the second coal.
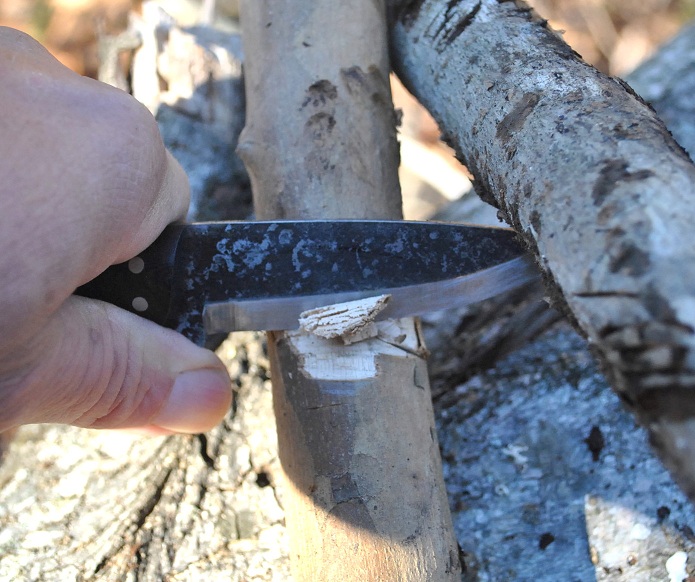
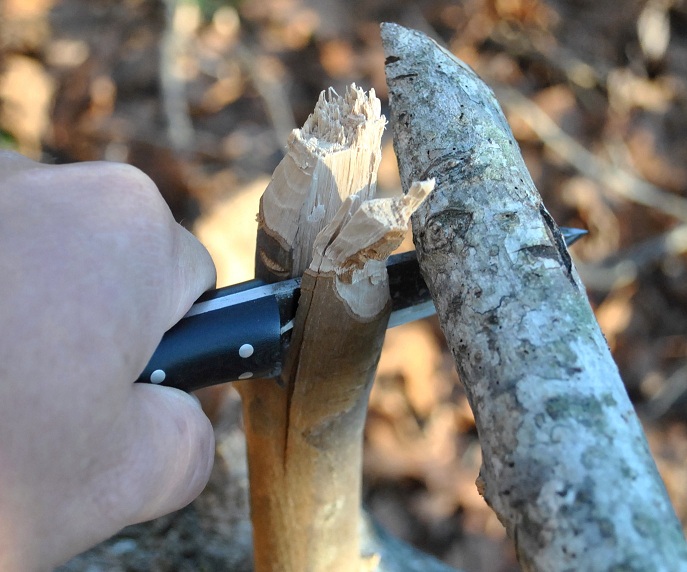
Next on the list is the bearing block. The bearing block is the piece that is used to both hold the spindle in place with while drill, and to apply the downward force on the spindle while drilling. For the bearing block I prefer to use a very hard piece of wood so that the surface of the divot will gloss over from the heat of spinning and create a hard surface that is more difficult for the spindle to drill into. A section of a well seasoned hardwood limb will do nicely, something like Hickory, sweetgum, or sycamore. By using another section of limb as a baton a small knife can be used to "chew" through the limb removing material until the limb can be broken cleanly, splits in the bearing can cause some major problems. I like my bearing block to be about as long as, and no more than a few inches longer than, the width of my palm. This give me plenty of grip for control without fatiguing the wrist as a longer piece would.
I like a flat surface on the bottoms of my bearing blocks to carve the divot into because for me it makes indexing the bearing block while drilling easier to do. This means less chance of inadvertently rotating the bearing block in use and increasing the resistance on the top of the spindle. The idea is to decrease the amount of friction at the top while increasing the amount of friction at the drilling end. This flat spot is easily achieved by using the same baton used before to drive the knife through the limb section lengthwise splitting off the side of it.
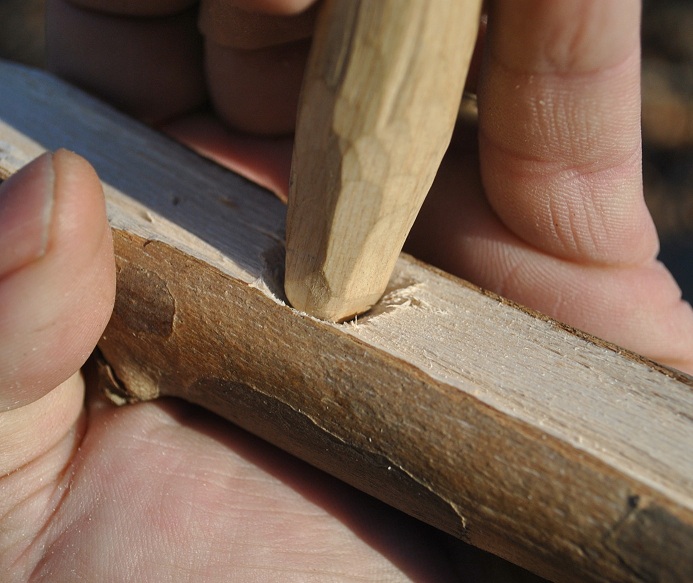
You do want to make sure the divot is deep enough for the spindle to seat in securely. Few things are more aggravating than having a spindle snatched from the bearing part way through the drilling phase, and the closer to achieving the coal, as well as the greater the need for the fire, the more aggravating it is.
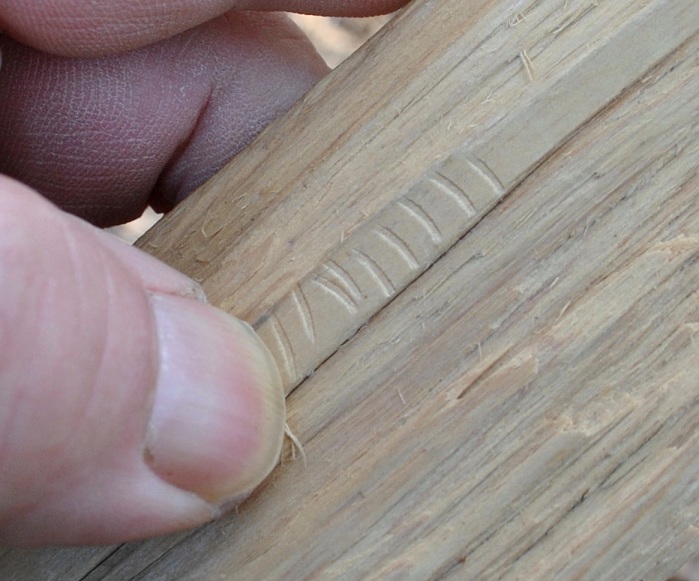
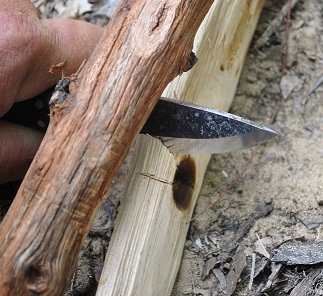
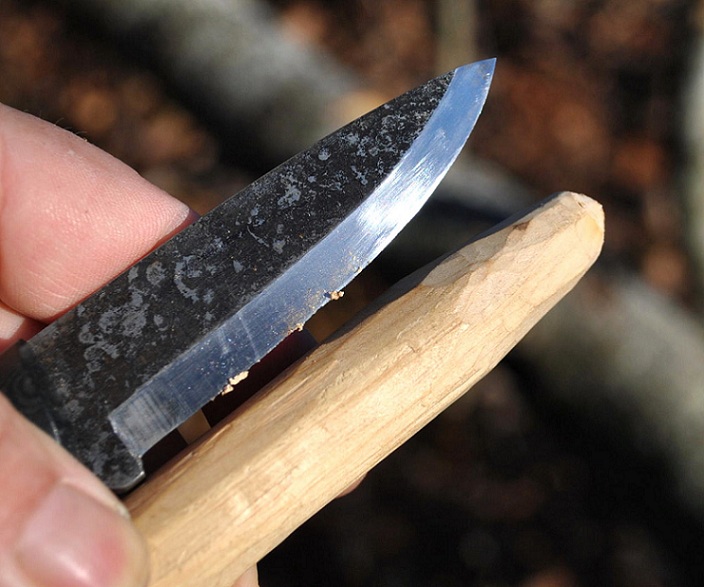
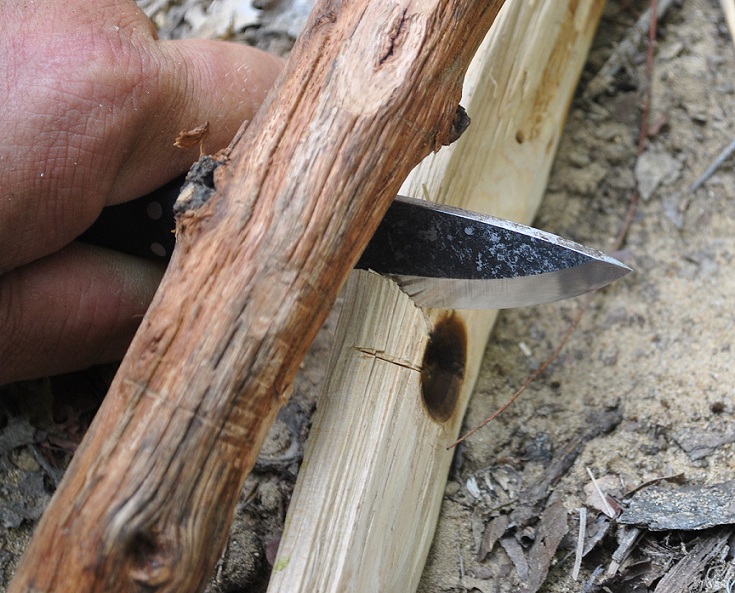
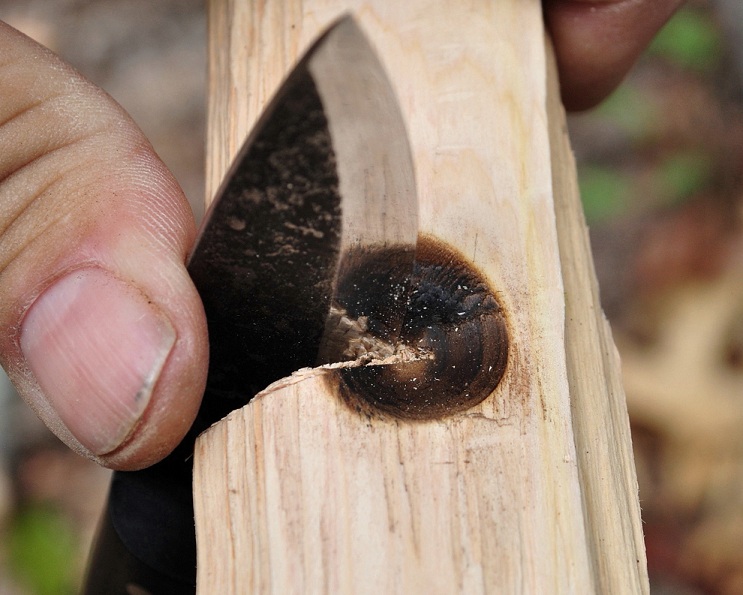
Now that we have the bow, spindle, and bearing block ready to go it is time to make the hearth-board. This can be done a few different ways, but often involves some splitting. You want wood that is dead and dry, but not spalted or rotten. A good test of condition is the fingernail test. You want to be able to dent the wood with your nail, but not sink your nail into it. In the picture the row of cross-grain lines in front of my thumb are dents made by pushing my thumbnail into the wood. This tells me this piece of wood is a likely candidate for making my hearth-board from
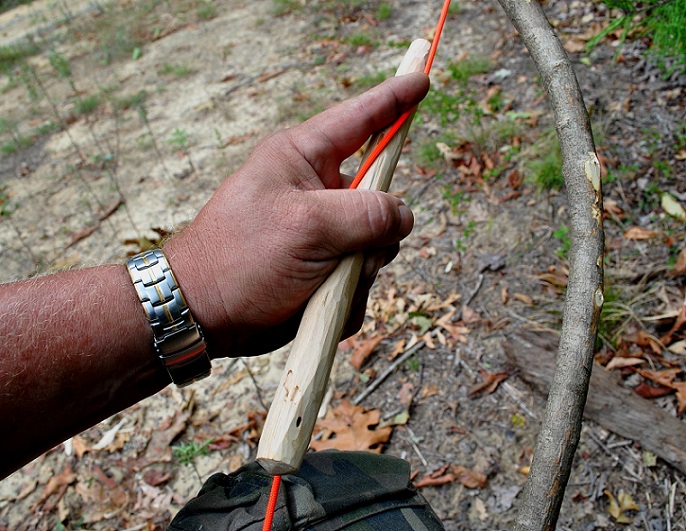
Now that you are ready to burn the socket into the hearth-board the first thing step is to string the spindle. I do this by holding the bow in my left hand with the string up and place the spindle under and against the string with the drilling end facing to my right. Then I pull up on the spindle, flexing the bow a good bit, and rotate the spindle 180 degrees in a clockwise motion. I use the bow with my right hand, if you are left handed you will want to change the direction of the spindle and twist it counterclockwise.
Once I get the motion started and the bearing of the spindle end is around past the line of the string I hold the bearing end of the spindle in the weak hand, place my thumb between it and the string for a brake, then place the end closest to my body against my thigh to stabilize it while I grasp the other end. Next I compress the bow to relieve the tension on the bow string and simply use the drilling end of the spindle as a lever to rotate it forward in a clockwise motion.
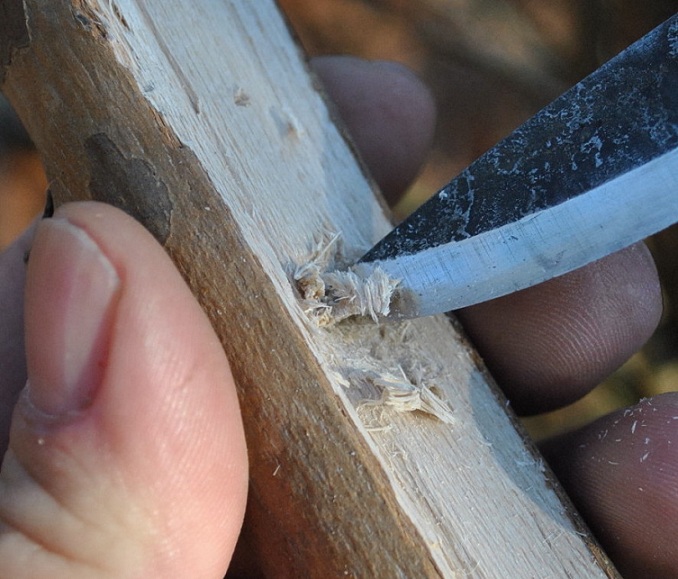
Once I have the flat surface to work with I locate the center of this flat area and bore a divot that is used to mate the bearing with the spindle. I do this using the tip of the knife in a twisting/cutting motion to remove the amount of material necessary to create a socket that is large enough in diameter to accommodate the top of the spindle with no resistance on the sides.
Now a small divot needs to be made in the surface with the center point being roughly the width of the spindle, or a little bit further, from one edge. This divot is similar to the one made in the bearing block but doesn't need to be bored as deep because on this one the spindle needs to be burned into it to properly mate the two pieces. This divot only needs to be deep enough to hold the spindle in place during the initial phases of burn-in, the drilling motion will deepen the hole and get it to the desired shape.
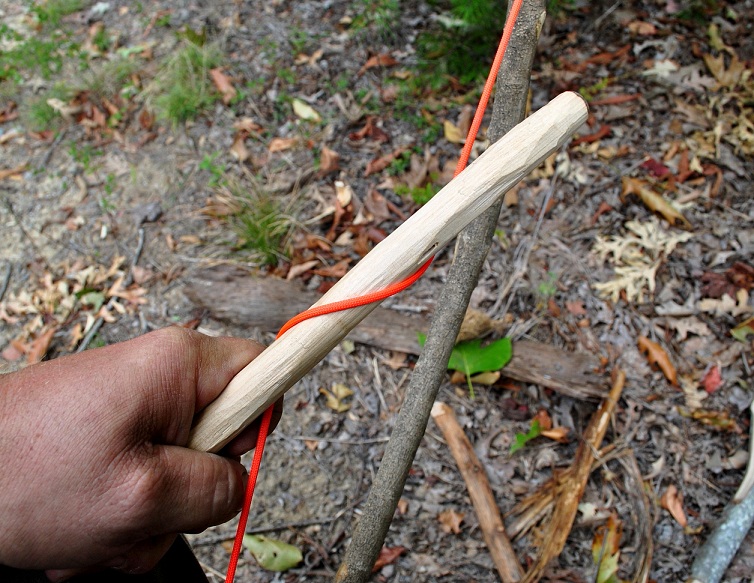
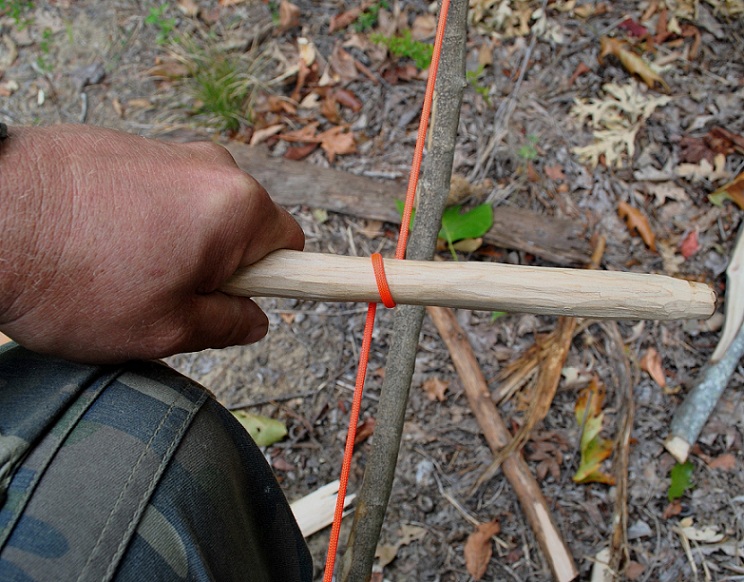
Once you have the spindle in place the bearing end of the spindle should be pointing in the direction of your strong side. There should also be a good bit of tension on the string at this point, enough so that the spindle feels like it is trying to un-string itself. You want the string nice and tight so that it gets a good bite on the spindle and turns it rather than slipping on it once the friction of the drilling really starts to heat up. The string itself will heat up and stretch out so you need to make sure it is good and tight to start with. This is a reason I prefer a bow with a nice pronounced curve rather than a straighter bow. This type is in my opinion easier to flex while stringing so you can have the cord nice and tight to start with.
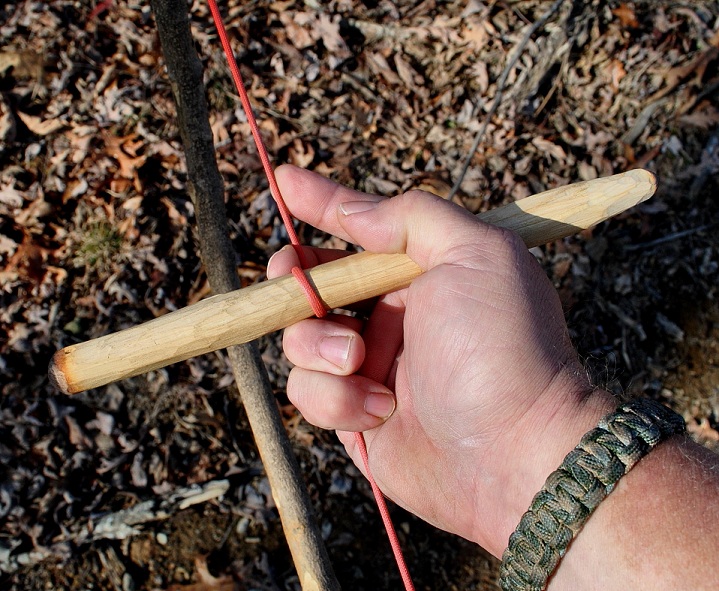
At this point I grasp the spindle from underneath with my strong hand with the string running between my index and ring fingers and apply pressure to the string with my forefinger. This is for me the most comfortable position to use to keep the spindle strung as you get yourself in position and everything else where it needs to be, and then place the drilling end into the divot on the hearth-board and reach around place the bearing block on top with the weak hand.
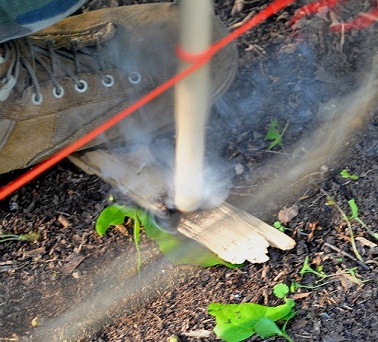
With all parts ready to go you are ready to burn the spindle in and create the socket in the hearth. Holding the strung spindle in the strong hand, place the hearth-board in a level spot. Now place your weak-side foot so that the divot is just to the side of the inside edge of the foot, and kneel on the strong-side knee. Next, holding the bearing block in the weak-side hand, hook the wrist around the weak-side shin. Now place the drilling end of the spindle in the divot on the hearth-board and hold it in place using the bearing block on the top of the spindle. By locking the wrist against the shin and applying downward force on the spindle to hold it in place you can let go of the string and spindle with the strong hand to adjust your position. The wrist needs to be locked tightly against the shin to be stable and the spindle needs to be as perpendicular to the hearth-board as possible.
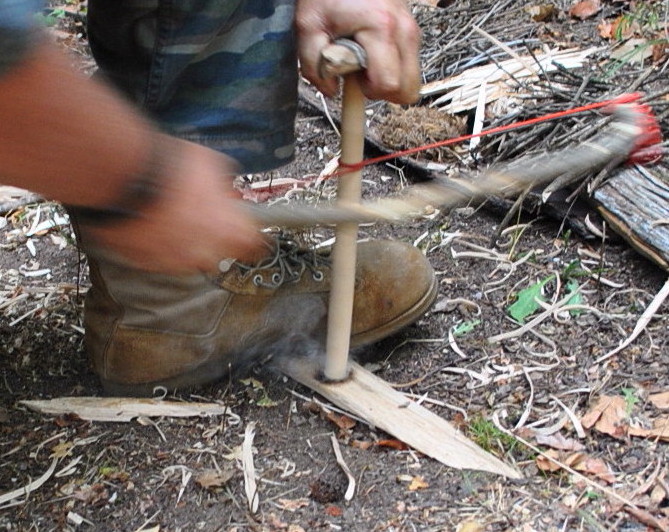
Now, while holding firm pressure and downward force on the spindle with the bearing block in the weak hand, pick up the handle end of the bow. Align the bow as perpendicular to the spindle as possible and start a push pull motion. This will turn the spindle, and holding the alignment of the bow straight (perpendicular to the spindle) will keep the string from riding too far up and down the spindle. You want to apply a decent amount of downward force and achieve a good amount of speed while drilling in order to produce the heat and friction needed to burn/drill the spindle tip into the hearth-board to make the socket. You want to see a good amount of smoke in this process.
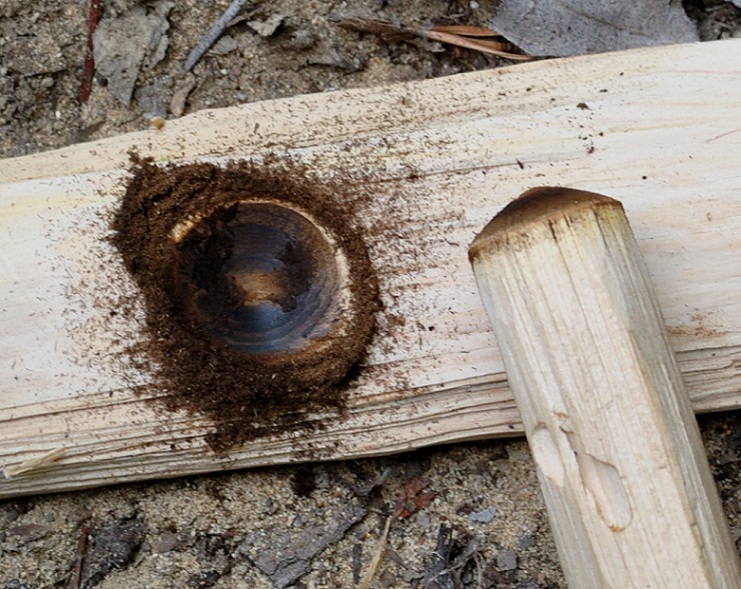
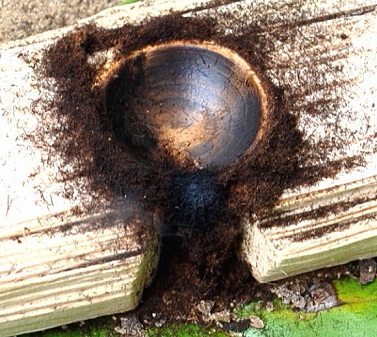
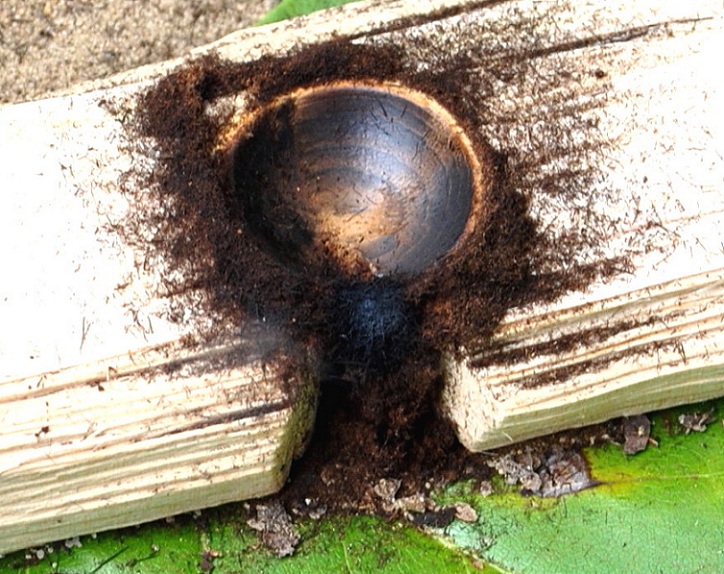
When the socket has been burned into the hearth-board you should have a ring of dark dust around the rim of the socket. This dust is nearly charred and very dry powdered wood. Do not throw it away, rather find a leaf or similar material to place it on and save it, it will come in handy in a few minutes when it is time to go for making a coal.

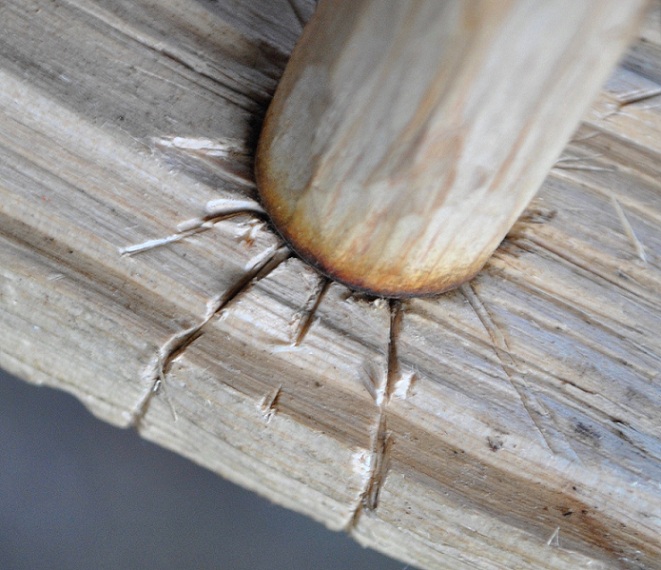
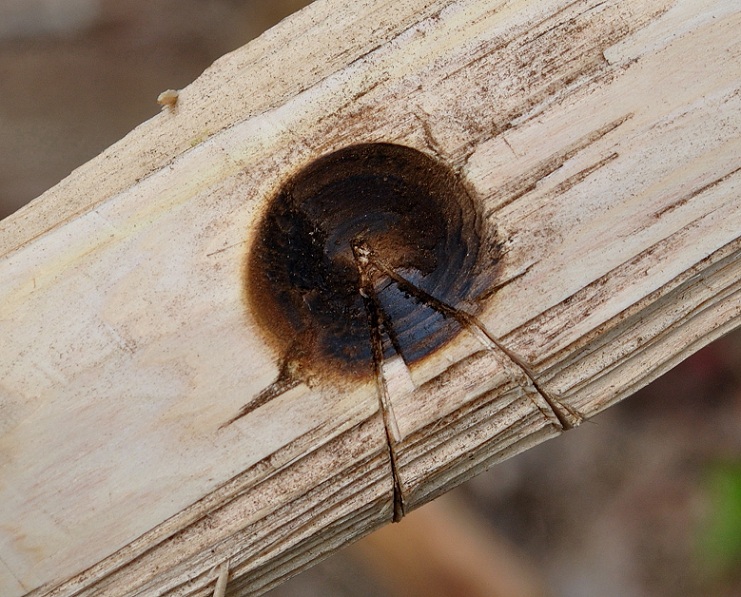
Making the notch is an extremely critical step in the process. The dimensions are very important to effectively achieve the ember, and patience needs to be exercised here. This notch is not just a randomly cut shape in the edge of the board, there is a formula that works rather well. This formula is that the notch should be 1/8 of the diameter of the spindle at the point where the notch passes through the rim of the socket. To achieve this I use the tip of a knife and score the divot into quarters. The first line being across the grain and the second one with the grain. Then I score that again making the socket circle look like a pie cut into 8 slices. Last on the two "pie slices" nearest the edge I half those again and continue the lines to the edge of the board and down the side.

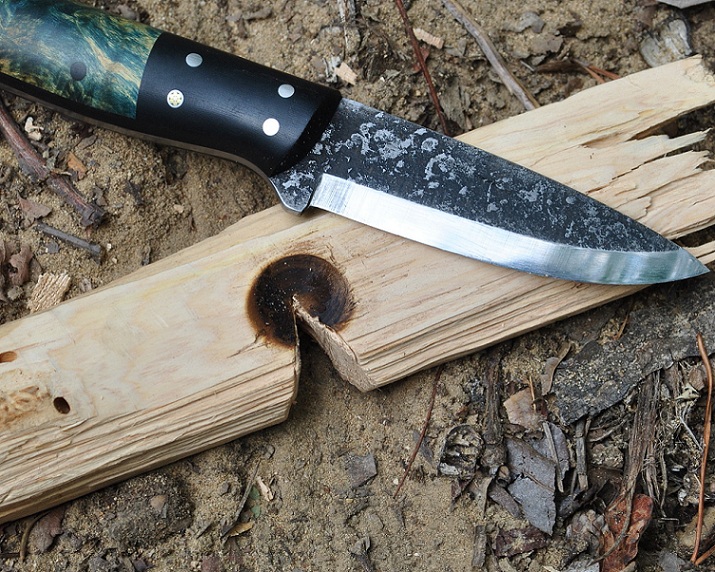
The next step is to cut out the all important notch in the hearth board. The notch is a triangle shaped cut in the side of the hearth-board that starts at a point at the center of the socket and extends to the side of the hearth-board. This notch will cut and collect the dust that will form the ember needed to make fire.
The easiest way I know to cut out the notch is to use a small saw, I like the ones on Swiss Army knives, they are the best small saws I know of. However if such a saw is unavailable the next easiest method I know of is to use a small limb as a baton and gently tap the blade of the knife running the edge along the insides of the lines of the notch making the notch smaller than it needs to be. By alternating between batoning and whittling, connecting cuts to remove the material from the notch you can avoid splitting out the notch and making it too large. Making the notch bigger if it is too small is easy to do, if it is too large it means starting over with another socket.
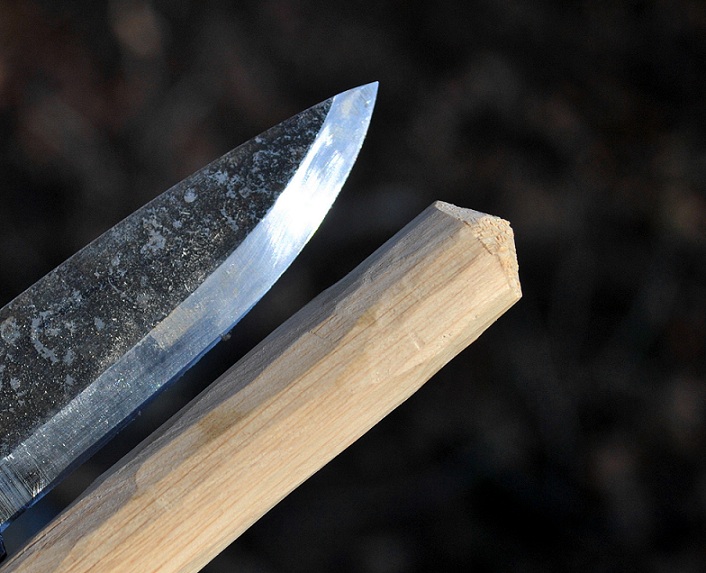
Once the general shape of the notch is formed I go back and smooth up the sides of the notch and clean it out to the dimensions I want. As a personal preference I like to make my notches a little bit wider on the bottom side of the board than on the top, leaving the top at the dimensions originally drawn out. This forms an acute angle on the sides of the notch that in my experiences cuts the charred dust from the spindle tip more efficiently and speeds up the process of achieving an ember. The surfaces of the notch need to be as clean and straight as they can be made, and having a nice sharp knife makes this much easier to do.
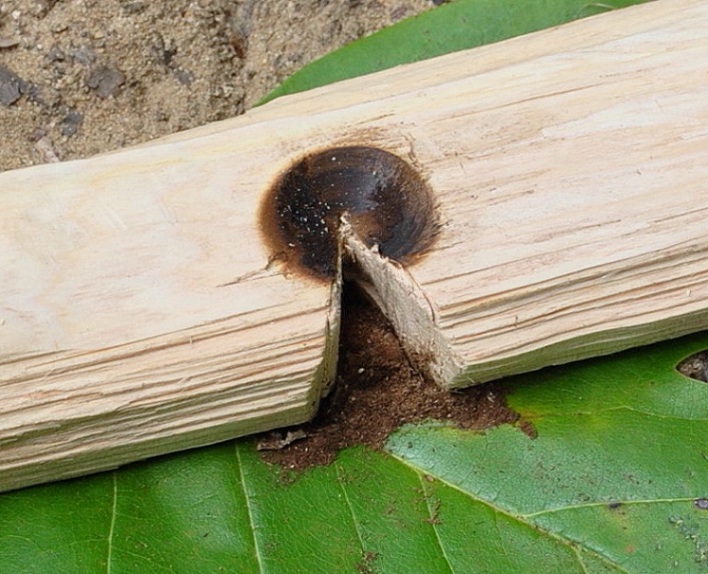
When you are through shaping the notch it should appear like this. It should have good clean edges and taper slightly from top to bottom being slightly wider on the bottom. The reason the size of the notch is so critical is because this is where the ember you will use to start the fire will form. If the notch is too narrow there will be a lot of heat build up, but not enough oxygen available to allow the ember to form. If the notch is too wide then there will be plenty of oxygen but not enough heat build up. The 1/8 spindle diameter formula, and very slight deviations either way offer the best mix of both heat and oxygen to allow the ember to form.
Now that all of the parts are ready to use it is time to get the tinder and fuel ready to go. There are several different types of tinder that can be used to turn the ember into flames. Fine wood shavings, very dry fibrous leaves, the fibrous inner bark from some trees, dry grasses, and various types of bark such as cedar or paper bark from some of the birch trees. One of my favorites to use is cedar bark because it is very fibrous, makes a very good tinder nest, and when dry transfers the ember to flames really well. I also like it because there are so many cedar trees in the South East United States. For kindling just gather the driest small twigs or split some small pieces of dry wood as you would with any other fire lay.
This is where that saved dust comes into play. Place the hearth-board on a level spot again, and this time lay it on the leaf with the dust with the leaf and pack the dust into the notch. This is somewhat of a short cut because this way it takes less time for the notch to fill with dust to the point where it is compressed in the notch and pressed against the hot tip of the spindle which will cause it to ember.
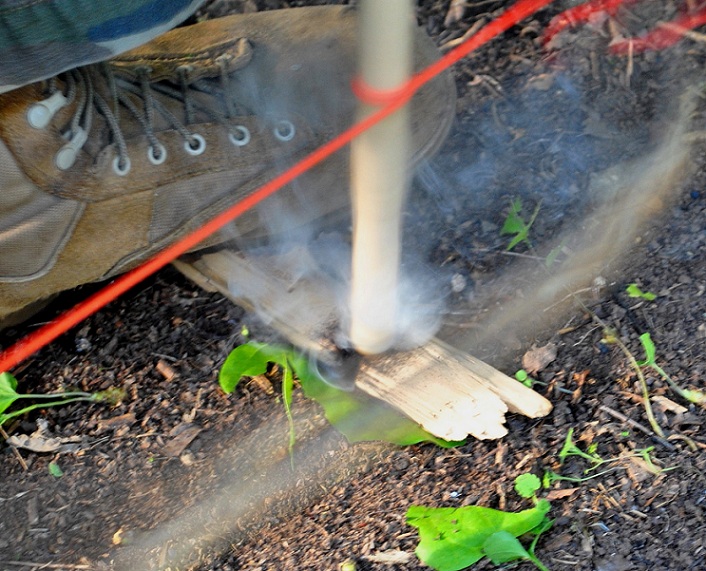
When you are going for the coal you want to start out with a good bit of downward force on the spindle and moderate speed. This is where you want to produce a lot of dust in the notch. After about 30 seconds or so you should see smoke begin to rise from the socket, and this is when you want to back off the pressure a bit and increase the speed. Here is where you want to achieve the heat needed to turn the dust into an ember. In this last step you want to see lot of smoke. Once the smoke is really going good then you want to increase your speed as much as possible and really go all-out for a good slow ten count.
If everything has gone right then the ember will form at the top of the notch. There should be smoke rising when you move the spindle away from the divot (do this without a lot of disturbance to the hearth). Fan that smoke away with your hand and if you see more smoke rise then yes you do have an ember. Gently fan it a little more to give it some extra oxygen and let it start to expand. You will see the ashen color expand across the top of the ember as it smolders.
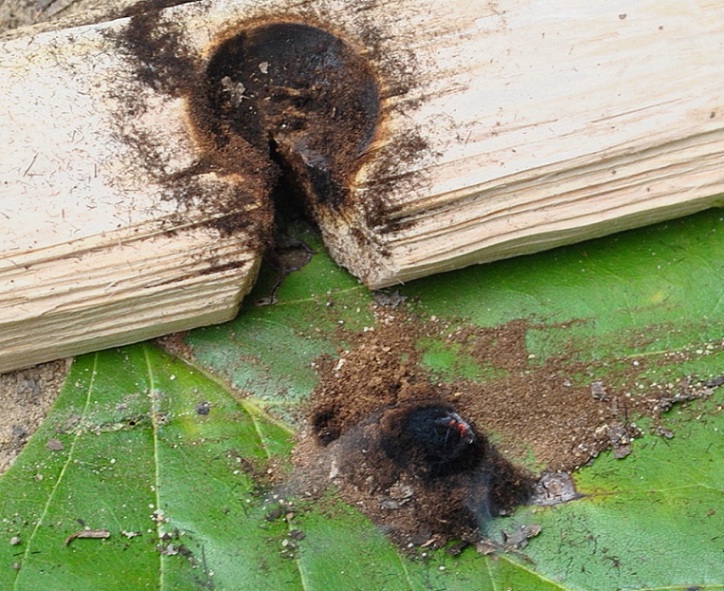
Gently tap on the hearth to help separate the ember from the notch and then carefully lift the board up and away from the ember. You may need to use a twig to separate the ember and hold it in place as you move the board. Now gently fan the coal with your hand to give it a little extra oxygen and let it smolder and expand a bit.
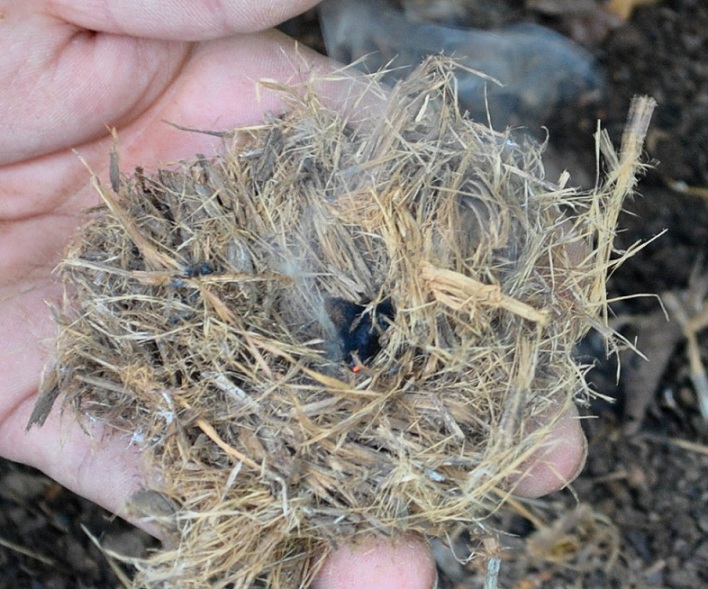
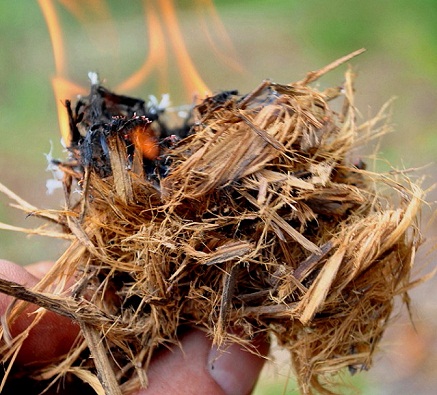
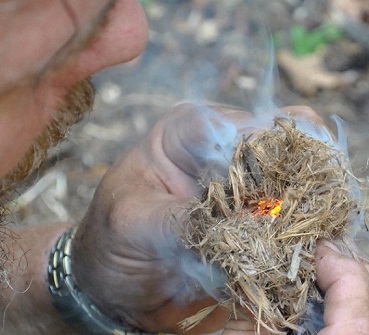
Now that you have an ember it is time to turn the glowing coal into flames. First gently place the ember in the tinder nest and very lightly blow on it to make it expand, then close the nest around it loosely. You want to envelope the ember with the fibers of the nest. you DO NOT want to crush the ember, but you do want the nest close enough around it that the sparks from the ember do not just blow through holes in the nest as you blow on it to expand the ember.
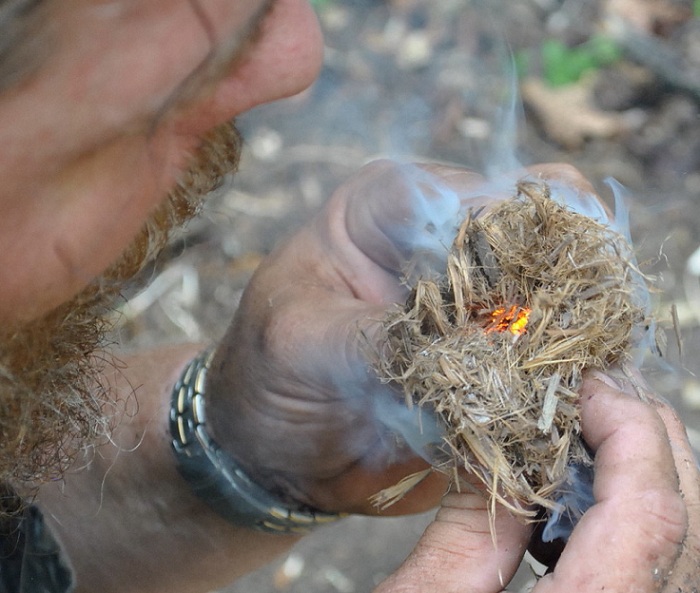
Here is where you blow that ember into flames. Holding the nest firmly together with both hands, and holding it fairly close to your mouth blow into it. Start out with light steady (long) puffs and increase the force of your breaths as you see the smoke increase and the glow of the ember expanding. Once you are blowing onto the nest hard there will be sparks flying, you must take care and protect your eyes. It can even be a good idea to close them while blowing because they will swirl around a bit at times.
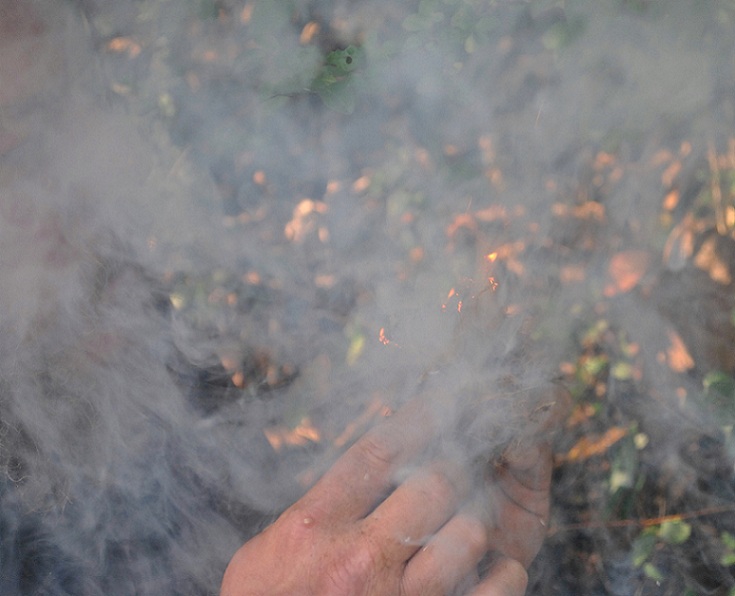
While blowing the ember into flames there will be a lot of smoke. You will want to hold the tinder nest down-wind from your face. If there is no breeze, and sometimes even if there is, then you will want to momentarily push the tinder nest away from your face and turn your head to the side when inhaling between puffs. Inhaling even a partial a lung full of this smoke can be enough to send you into a coughing fit bad enough to lose the ember and have to start the drilling process all over again.
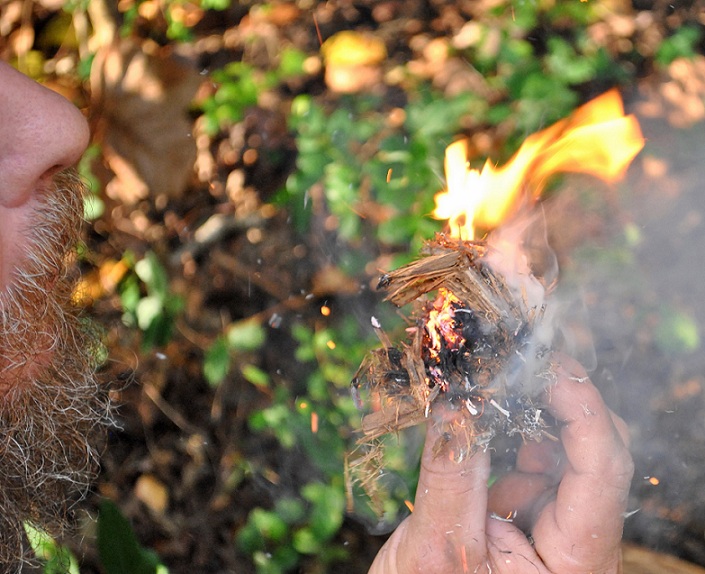
A large amount of smoke is a really good sign. In most instances it lets you know that you are about to achieve the flames needed to turn you little pile of kindling and fuel into the crackling flames of a warming fire. You need to take care with this step. The tinder nest will actually start to flame in your fingers. Heat and flames rise so at this point you will want to make sure you are holding the nest from the bottom.

Once you have seen the first flames then place the tinder bundle where you want your fire and add the smallest pieces of kindling and blow the nest into flames again. If the kindling is stubborn you may need to keep blowing on the nest to increase the heat. For beginners a large tinder nest is always a good idea until you get used to using this method. When using grasses this part will go fast, you will want to be very near, as in on your knees and right over, the spot where you want your fire and hold the nest in place with your kindling as you blow it into flames. The slower burn time is another reason I like to use the cedar bark. If the ground is even slightly damp then you will want to make a base of twigs or bark to build your fire on so that the tinder nest and first coals do not absorb moisture from the ground.
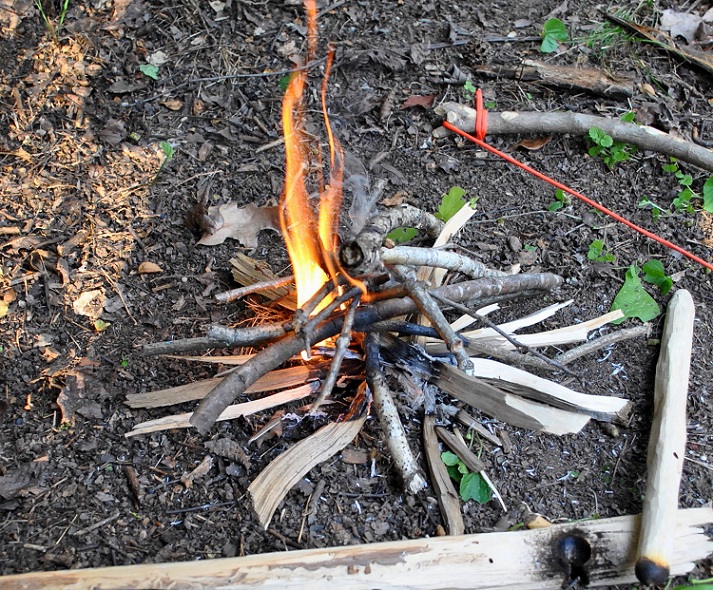
Once you kindling is burning on its own then just keep adding smaller pieces and work your way up to the larger ones just as with any other fire lay. Soon you will have a nice crackling fire to warm by, cook over, for signaling, or to purify water, and all from the simple act of rubbing sticks together.